Monday, March 14, 2016

Howto check Linux memory usage

Ever found a Linux suddenly having low free memory or none at all? This is something to check when the server suddenly starts slowing down or not able to complete processes.

Here are several method to diagnose and maybe identify a fix. Check the memory usage then identify the process causing the extreme usage. Next, work on that process configuration.


Check memory usage

Display available and used memory with 'free' command
# free
Or
# free  -m

The top live monitor
# top

Press m to display memory
Press Shift + m to sort by memory percentage
Press R to reverse the sort


List processes and amount of memory being used
# ps -e -o pid,vsz,comm=
Or
# ps -e -o pid,vsz,comm= | sort -n -k 2

Or
# ps aux  | awk '{print $6/1024 " MB\t\t" $11}'  | sort -n


View meminfo
# cat  /proc/meminfo
or
# vmstat -s

View the RAM device installed
# dmidecode -t 17


Check the process

List processes that open files
# lsof


Several TYPE of files are monitored

REG – Regular File
DIR – Directory
FIFO – First In First Out
CHR – Character special file

A description of the file is shown by FD
cwd – Current Working Directory
txt – Text file
mem – Memory mapped file
mmap – Memory mapped device
NUMBER – Represent the actual file descriptor. The character after the number i.e ‘1u’, represents the mode in which the file is opened. r for read, w for write, u for read and write.

List processes base on process names
# lsof -c ssh

List processes base on process id
# lsof -p 1234

Where 1234 is an example of the process id (pid).

Done

Tuesday, March 8, 2016

Boot Centos Linux to Windows

Centos 6 and 7 provide different approach for booting to a graphical windows interface known as X. Firstly, ensure the relevant packages to support display of windows where most of it are bundled as one of the popular Linux desktop environments.

Among the popular current desktops environments available are;

  • Gnome
  • KDE
  • Unity
  • Xfce
  • LXDe
  • Cinnamon
Here are the steps.

Centos 6 Approach


Edit the file /etc/inittab and change the number 3 to 5 as shown in the line below

id:5:initdefault:

Then reboot.

To start graphical windows without reboot, at the command prompt type

init 5
or
startx

Centos 7 Approach


Login as root and the prompt type

sudo systemctl set-default graphical.target

Then reboot.

To start graphical windows without reboot, at the command prompt type

sudo systemctl start graphical.target

Done

Install GIMP on Centos 6

Centos 6.6 provides the popular graphic editing software GIMP at version 2.6.9. The current stable release is GIMP 2.8 for those who seek the additional editing features (link). Existing Centos 6.6 does not have the required newer libraries to support GIMP 2.8.

The details of GIMP is described as below.

Name        : gimp                         Relocations: (not relocatable)
Version     : 2.6.9                             Vendor: CentOS
Release     : 8.el6_6                       Build Date: Thu 20 Nov 2014 02:06:25 PM EST
Install Date: Tue 08 Mar 2016 03:09:46 PM EST      Build Host: c6b9.bsys.dev.centos.org
Group       : Applications/Multimedia       Source RPM: gimp-2.6.9-8.el6_6.src.rpm
Size        : 48118103                         License: GPLv2+
Signature   : RSA/SHA1, Thu 20 Nov 2014 04:10:42 PM EST, Key ID 0946fca2c105b9de
Packager    : CentOS BuildSystem
URL         : http://www.gimp.org/
Summary     : GNU Image Manipulation Program
Description :
GIMP (GNU Image Manipulation Program) is a powerful image composition and
editing program, which can be extremely useful for creating logos and other
graphics for webpages. GIMP has many of the tools and filters you would expect
to find in similar commercial offerings, and some interesting extras as well.
GIMP provides a large image manipulation toolbox, including channel operations
and layers, effects, sub-pixel imaging and anti-aliasing, and conversions, all
with multi-level undo.


Flexibility on editing include availability of many brushes and patterns.


 Here are steps to install the standard GIMP version 2.6.9
 

Step 1: Install GIMP


# yum install gimp


Step 2: Install additional brushes and patterns

Install additional brushes and patterns. Brushes include swirls and text to enhance strokes. Patterns such as clouds and funnymess.

yum install gimp-data-extras

Start GIMP from the desktop menu. Click Applications ->Graphics ->GNU Image Manipulation Program


Done

Saturday, February 20, 2016

Install OSMC on Raspberry Pi2

Raspberry Pi 2 (RPI2) provides a flexible multimedia centre for movie streaming, watching youtube, using a web browser and options to addon many Linux applications. OSMC is one of the images that can be downloaded unto an RPI2 from osmc.tv (download page or FTP). This Debian Jessie based system is great at running the RPI2 and allow developers space to enhance to their needs.

The media player system KODI, provides an interface to multimedia contents such as movies, online TV, videos, photos and musics. KODI itself does not have any media contents, but due to its extensible nature, many developers have created plugins to access external contents and addons to extend its functionalities. Media contents could reside in the same device as KODI, in a local area network, stream from the internet or cached contents from internet. KODI 15 comes with the current OSMC.

* Consider OSMC as an upgrade of Raspbmc.

This is an update to previous post "Raspberry Pi: Getting Started with OSMC" and I do not expect it to go into too much details. When I mention OSMC, it might also refer to KODI as its typically the only screen seen when running this RPI2.

Step 1: Starting OSMC

Download OSMC image from raspberry.org and image copy the .img file to the blank SD card. Tools such as Win32 Disk Imager can be used for this purpose.

Plug SD card into RPI2 and start RPI2 (already have internet connection).

Automatically start installation process.


It will reboot once installed successfully.

Step 2: Basic configuration

The default layout uses OSMC skin. Below is the OSMC main menu screen. Default appearance is handled by the skin called OSMC.


 It shows the following options;
  1. Videos
  2. Music
  3. Pictures
  4. My OSMC
  5. Favourites
  6. Programs
  7. Settings
  8. Power

Configure Screen size

The screen display may appear outside of the screen area. Change the zoom size until everything meets your satisfaction. From OSMC home page, click Settings ->Appearance ->Skin. Choose your zoom level and press Esc key until back to OSMC main menu.


Configure Timezone

Configure the timezone for correct time display. Click Settings ->Appearance ->International. Choose your region and the OSMC time should be update instantly.

Configure Skin

Default skin OSMC can be changed to KODI's default skin called Confluence. From OSMC home page, click Settings ->Appearance ->Skin. Choose skin as confluence and press Esc key until back to OSMC main menu.

More notes from KODI website: Quick start guide, Home screen controls,

Step 3: Add Youtube addon

In Videos menu there is an option to link your Youtube account with OSMC. This allows viewing of all your Youtube channels. From the OSMC main menu, click Videos ->Video add-ons ->Get more... ->Youtube

Click Install

Click launch. (From the OSMC main menu, you can click Videos ->Video add-ons to watch Youtube).

Follow the instructions on screen.
One of this includes accessing youtube.com/activate on a PC to enter the code given by the add-on in OSMC.

Troubleshooting:

1. Mode Not Supported

If after installation process, RPI2 boots and screen displays a message "Mode Not Supported", it means the display resolution was not automatically detected correctly. This happens on one Samsung TV.

Solution:
SSH into the OSMC and edit  /boot/config.txt
See command line tips at Raspbian Command Line Basics 101

Updated file for mode CEA
gpu_mem_1024=256
hdmi_ignore_cec_init=1disable_overscan=1
start_x=1
hdmi_group=1
hdmi_mode=20
disable_splash=1
dtoverlay=lirc-rpi:gpio_out_pin=17,gpio_in_pin=18

ALTERNATIVE Updated file for mode DMT
overscan_top=16
hdmi_mode=4
gpu_mem_1024=256
overscan_right=24
force_turbo=0
over_voltage_sdram=0
config_hdmi_boost=4
disable_overscan=1
initial_turbo=0
start_x=1
hdmi_group=2
sdtv_aspect=0
overscan_bottom=16
overscan_left=24
disable_overscan=0
hdmi_force_hotplug=1
arm_freq=900
sdram_freq=450
core_freq=450
hdmi_ignore_cec_init=1
over_voltage=0

2. Youtube add-on errors/issue.

Successfully login after the 2 google app authorisation, but displays empty list and
Display error exceeded quota (of some sort)

Solution:
Step 1: Activate the Google API v3
All Google App requires API v3, as derived from forum posting #2904.

Login to your google developer account and enable the above API.

Step 2: Use your own browser key, Oauth id and secret.
Looks like the default developers combination of above does not allow too many to use it. In posting #2847.

Login to your google developer account and create the above. A new project is created if none is created yet.

The newly created info from above should be updated in the file login_client.py that is found in /home/osmc/.kodi/addons/plugin.video.youtube/resources/lib​/youtube/client/

Find the line as below and edit the key, id and secret values.

'youtube-for-kodi-15': {
            'system': 'Isengard',
            'key': 'The_browser_key',
            'id': 'The_oauth_id_.apps.googleusercontent.com',
            'secret': 'The_oauth_secret_word'
        },

Done

Wednesday, January 20, 2016

RPI2 - Dashing Dashboard Installation Tutorial


Dashboard provide a quick view of information on the system. This can be a desktop application or web based. One such example on Raspberry Pi 2 is Dashing which is based on the Sinatra Framework and Ruby.

The Sinatra Framework from http://sinatrarb.com provides web application development quickly on Ruby. Example of installation on Ruby;

$ sudo gem install sinatra


Pre Installation checklist


  1. Raspbian Jessie
  2. Ruby


Installation of Dashboard on Dashing.

Step 1: Install Dashing.

$ sudo apt-get update
$ sudo apt-get install ruby-dev
$ sudo apt-get install ruby2.1-dev
$ sudo gem install bundler


Install Dashing 1.3.4 and create a new project called my_dashboard_project.

$ sudo gem install dashing


Step 2: Create a new project space

$ dashing new my_dashboard_project
$ cd my_dashboard_project
$ ls -l
total 36
drwxr-xr-x  6 pi pi 4096 Jan 20 12:34 assets
-rw-r--r--  1 pi pi  339 Jan 20 12:34 config.ru
drwxr-xr-x  2 pi pi 4096 Jan 20 12:34 dashboards
-rw-r--r--  1 pi pi  122 Jan 20 12:34 Gemfile
drwxr-xr-x  2 pi pi 4096 Jan 20 12:34 jobs
drwxr-xr-x  2 pi pi 4096 Jan 20 12:34 lib
drwxr-xr-x  2 pi pi 4096 Jan 20 12:34 public
-rw-r--r--  1 pi pi   65 Jan 20 12:34 README.md
drwxr-xr-x 11 pi pi 4096 Jan 20 12:34 widgets


Change your directory to my_dashboard_project and bundle gems

$ bundle

Display installed gems

$ bundle show

Step 3: Start the dashing server


$ dashing start

Point web browser location at http://localhost:3030/sample


Whats next?

There are additional widgets that can be installed and new dashboards can be created. Here is an example of adding a widget from dashing.

Installing Server Status Squares widget with GIST_ID = 9588819

$ dashing stop
$ dashing install 9588819

From server status squares widget, copy the file server_status_squares.erb to the dashing dashboard directory in the project created above.

$ cp server_status_squares.erb dashboards

Point web browser location at http://localhost:3030/server_status_squares


WIP

Reference:
Dashboard on PI
Tutorial on Sinatra: Sinatra docsJust do it, Singing with Sinatra.
Dashing: Shopify,

Monday, January 18, 2016

Android Studio - Proguard Error Shows Unable to compute hash

In Android development, the standard development kit includes a tool to shrink, optimise and obfuscate the APK. This tool is known as Proguard.

Android Studio will provide the options to use Proguard if it is enabled. However, some classes or files do NOT like to be optimised and obfuscated. In particular Javascript files and reference to classes that do not exist in the path. Here is an example of how the error message may appear when building the signed APK on Linux & MS Windows.

Linux

Error:Execution failed for task ':app:packageMinirelease'.
> Unable to compute hash of /usr/development/BakersPercentage/app/build/intermediates/classes-proguard/minirelease/classes.jar

MS Windows

Error from proguard during build
Since the problem is a warning on GMS packages, I resolved on Android Studio 1.4 as follows;

Step 1: Verify project works

Open the project and make sure it can build without errors. 

Step 2: Edit build.gradle (Module: app)
Copy the existing release build type and paste as a new build release named minirelease (or any name you fancy).

buildTypes {
        release {
            minifyEnabled false
            proguardFiles getDefaultProguardFile('proguard-android.txt'), 'proguard-rules.pro'
            signingConfig signingConfigs.config
        }
        minirelease {
            minifyEnabled true
            proguardFiles getDefaultProguardFile('proguard-android.txt'), 'proguard-rules.pro'
            signingConfig signingConfigs.config
        }
    }


Step 3: Edit proguard-rules.pro

Add the following lines

 -keep class com.google.android.gms.** { *; }
 -dontwarn com.google.android.gms.**


Step 4: Build Signed APK

In Android Studio menu, choose Build-> Clean Project

Build-> Generate Signed APK...
Enter Key details and click Next.
In Build Type: choose minirelease.
Click Finish.


Done.

Friday, January 15, 2016

Android http audio streaming and MediaPlayer

MediaPlayer class provides a player for local files and online streaming. Its a pretty flexible class and allows syn and asyn calls to suit almost every type of needs.

Formats supported by Android is at http://developer.android.com/guide/appendix/media-formats.html

There are cases where online streams can be played on an Android emulator but not on actual Android device. This happened for Samsung Galaxy S5 with Android 5 OS.

This is what I found;


  1. There are two type of AAC streams in my list of sites. Streams using AAC-LTP AAC with SBR+PS doesnt work but AAC-LC is played satisfactorily.
  2. Audio in MP3 plays fine on emulator and actual Android device.


There are other APK that managed to play the same audio streams on That S5. Probably there is another type of mediaplayer-like class to stream audio with support of the AAC-LTP.

Conclusion if MediaPlayer stream doesnt play over HTTP
  1. Try to play the stream on VLC player and see if it works. Verification process.
  2. Seek alternative stream format if one doesnt work. Remember, only MP3 and AAC-LC works.
  3. Incorporate a decoder to manage the unsupported format. 
  4. Consider to use AudioTrack instead of MediaPlayer. This will require manual assignment of the codec and audio format.

Raspberry Pi 2 and a VGA monitor

The Raspberry Pi 2 (RPI2) model B (more details) comes with many input/output connectors and of which its display output is using HDMI type A. This HDMI is also known as Full HDMI.

Model B is the big brother of Model A+ that is much more cheaper for specific implementation in an embedded project where the most minimal use of electrical power is needed.

The RPI2 can be hooked up to a decent monitor or projector using VGA connectors. All that is needed is a HDMI to VGA adapter. This adapter may comes with additional functions like audio output, additional power source or USB. Price differences are huge but here is an example that I got from online and it works just fine with the NEC AccuSync LCD52v monitor.

HDMI to VGA cable plugged to RPI2 and female VGA.


Done.


Raspbian Command Line Basics 101

A few commands to display configurations of Raspbian on a Raspberry Pi 2.

At the Raspbian terminal, users can access a whole load of information. These can be useful for troubleshooting graphics, program conflicts and networking issues.

GENERAL


1. Display version of the Raspbian.
$ lsb_release -a

DISPLAY CONFIGURATIONS


2. Display the GPU chip version
$ vcgencmd version

3. The monitor hdmi mode
$ vcgencmd get_config hdmi_mode

4. Display current configuration
$ tvservice -s
$ tvservice -d monitor.dat
Translate monitor.dat into a readable text
$ edidparser monitor.dat > monitor.txt
cat monitor.txt 

This will display the monitor capabilities. In order to change the monitor settings, edit /boot/config.txt and determine to use CEA or DMT with the following lines

CEA uses hdmi_group=1
DMT uses hdmi_group=2

5. Is the monitor using CEA or DMT
$ vcgencmd get_config hdmi_group

6. Display supported CEA mode for the monitor
$ tvservice -m CEA

NETWORKING


7. Display all IP devices configured
$ ip a
Or just eth0 device
$ ip addr show dev eth0

Raspbian: Example output of basic commands

Friday, January 8, 2016

Howto Configure Static IP Address for Raspberry Pi 2

This is specifically for Raspbian Linux on Raspberry Pi 2 (RPI) using a wired ethernet cable.

Step 1. Connect the ethernet cable.

By default this connection is called eth0. Ensure its connected, look for the blinking lights then steady light on the RPI.

Step 2. Configure the static network information.

In this example I am using the following static IP address information:
IP address: 10.1.1.100
Gateway: 10.1.1.2
DNS: 10.1.1.3
Broadcast: 10.1.255.255

At the Panel, right click the network icon and choose "WiFi Networks (dhcpcdui) Settings".

Choose following;
Configure: interface eth0
Automatically configure empty options: checked
IP Address: 10.1.1.100
Router: 10.1.1.10
DNS Server: 10.1.1.3

Click Apply. Close the window and reboot RPI.

Done.

Test using the web browser or access the terminal and try the ping command.

Reference: RPiconfig in elinux http://elinux.org/RPiconfig

Tuesday, December 8, 2015

Introduction to IPTABLES Tutorial

My notes on iptables commands.

Firewall tutorial for iptables
Contents:

  1. View
  2. Append rules
  3. Insert a rule
  4. Delete a rule
  5. Default Policy
  6. Saving the rules

The problem with devices and applications not being able to access the server is usually due to configuration of the iptables firewall. This can be configured on an application or through command line terminal.


Monday, December 7, 2015

Raspberry Jam Kuala Lumpur 2015 - Kids at the Workshop

The Raspberry Jam Kuala Lumpur 2015 saw quite a huge turnout. This first Jam for Malaysia was on 5 Dec 2015 at Asia Pacific University (APU), Kuala Lumpur.

There were concurrent (parallel) sessions of free talks and hands-on workshop. Since the workshop was hands-on, participants who purchase/register for the workshop online included the price of hardware. This consist of;

Raspberry Pi 2 model B
Power adapter
Raspberry case (red & white)
Micro SD card (8GB)

There were ample parking along the road side as the huge parking lot was full. Probably due to a fun run being held at the same venue. A goody pack was given out during registration. At the first talk, the presenter from APU introduced a work in progress of a robot that uses raspberry pi (RP) and adruino.
Tele-presence and Tour Guide Robot using RP by APU
Its off to the workshop after that talk. The workshop title was "Getting your Raspberry Pi up and running and setting up for File sharing" and was conducted by Raspberry Pi Penang.

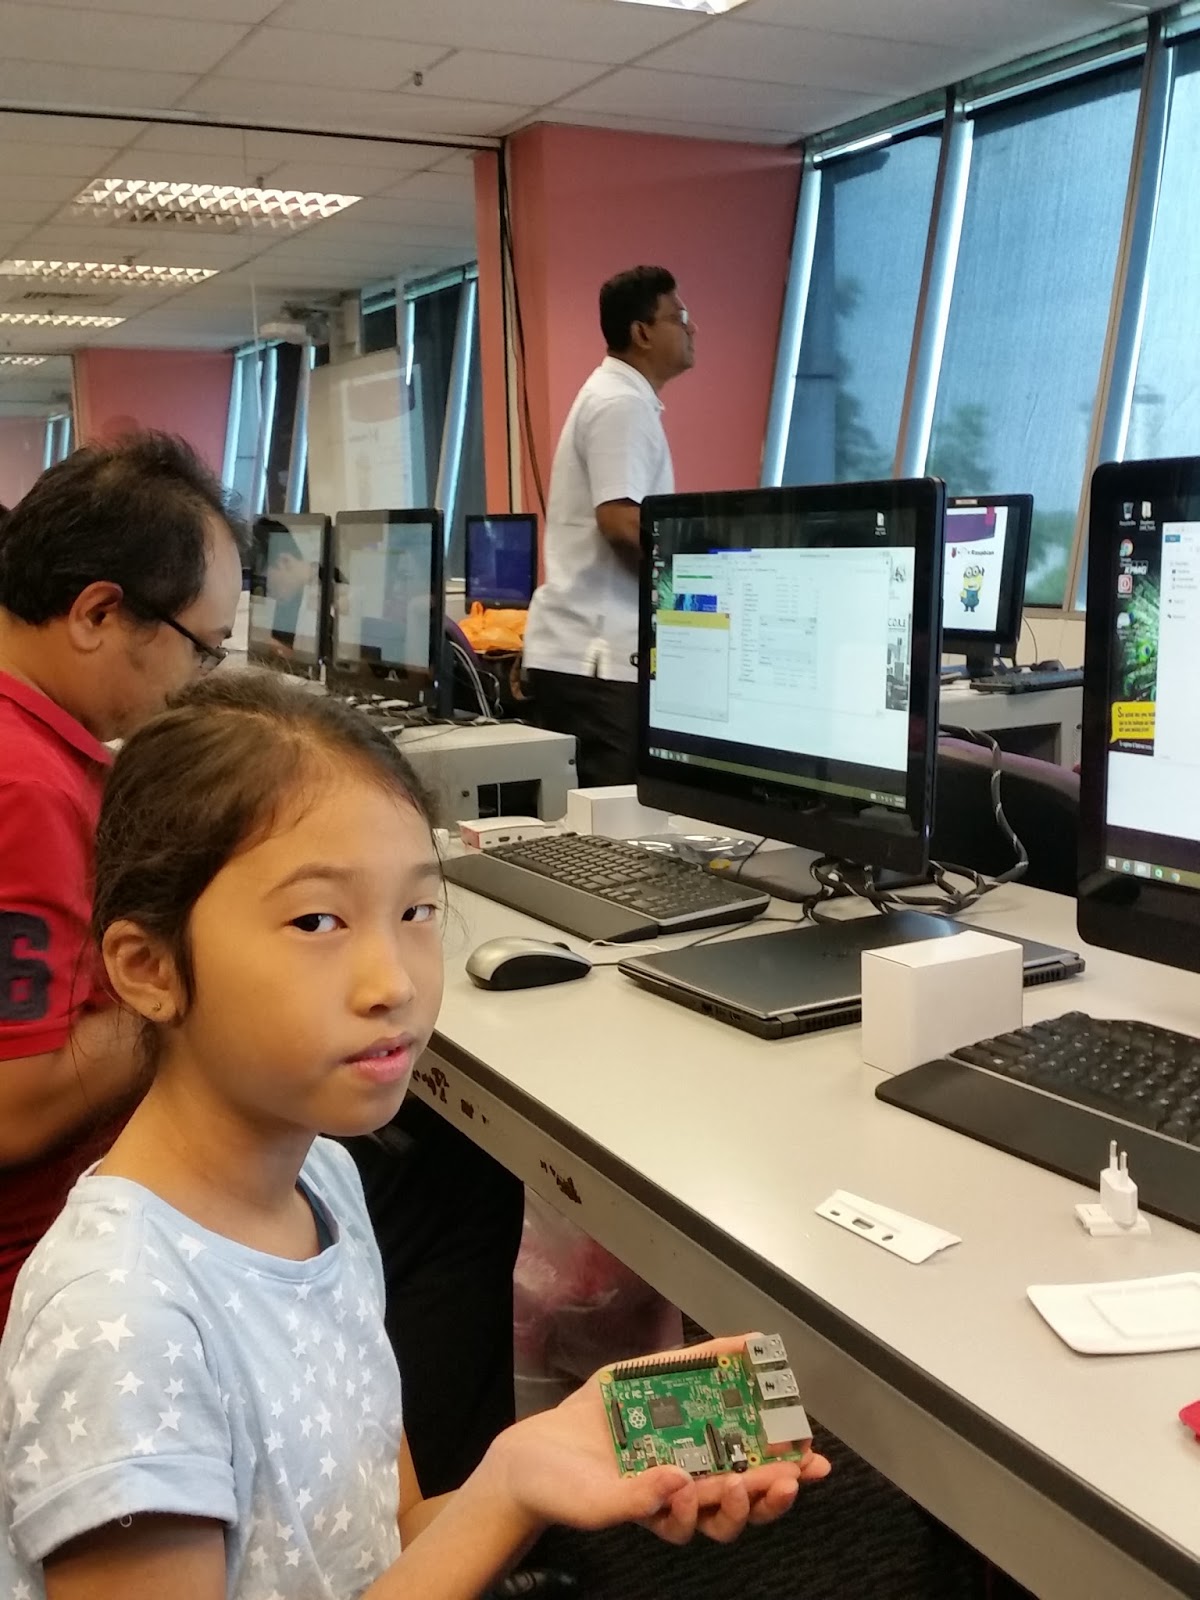
The number of participants was double the online registrations, as they allow walk-in registrations. There was another kid at the front row but Martha was nervous, not in a mood to talk to anyone. A quick check of our hardware and its found that the micro SD card doesn't come with an adapter. The laptops and PCs only had the standard SD card readers. Thanks to Fazli (I don't think he recognise me) for sharing his SD adapter.

Setting up the RP
Done fixing RP and casing


Following the instructions, she completed the installation of Raspbian (from MS Windows), updating and upgrading the Raspbian Jessie. Installed and configured Samba for file sharing. Didn't get a chance to test the file sharing as the instructor took more time than the allocated 1 hour session.


Martha updating Raspbian

While she was waiting for the others to complete the steps, Martha found Minecraft in the installed Rasbian. Tried to find the keys and explored Minecraft world. Its the first time for her to setup and she had an enjoyable learning experience.

Generally steps to create a file sharing server with the RP during the workshop;

Step 1: Install Raspbian

Download latest Rasbian image, currently its Jessie from www.raspberrypi.org and create the image on the SD card. Insert the blank SD card into the computer used to write the image. For MS Windows users, the software is called Win32DiskImager-0.9.5-binary and for Linux, the software is pre-installed called "dd".

Step 2: Update and Upgrade Raspbian

Take the SD card and install in the RP (make sure power is off). Plug-in all the cables (Monitor, keyboard, mouse, network) and turn on RP power. Watch the monitor screen as it boots.

Configure the settings from the "preferences" menu and reboot.

Open the terminal and type;
sudo apt-get update
sudo apt-get upgrade -y

Reboot.

Additionally I would suggest;
1. Change the default pi user password
2. Add additional tools, at the terminal type;
sudo apt-get install raspberrypi-ui-mods

Step 3: Install Samba

At the terminal type:

sudo apt-get install samba samba-common-bin

Assign access of the default pi user for file sharing. When prompted for password, enter the pi user password.

sudo smbpasswd -a pi

Restart samba

sudo /etc/init.d/samba restart

Done.

From a computer in the same network, use the network share tools to access the RP via IP address. You will need to enter the pi user password.

Example:

On a MS Windows, open the Windows Explorer and click on the network. type in the hostname of the Raspberry Pi. Select the option to Connect as a different credentials, since the Windows is likely to be logged in with a user other than the name "pi".


On MS Windows 8.1, the samba share needs to be map manually. Open a command prompt and type the following;

net use windowsdir shareserver\sharepath /USER:username thepassword

Example
net use Z:  \\10.1.1.103\pihome /USER:pi thepassword

Wednesday, October 28, 2015

Check Disk Usage on Windows with WinDirStat

Running out of disk space and wondering where it all went to? Windows users can have their disk summarised and a treemap generated through the use of WinDirStat.

This Windows programme is a port from an open source application called KDirStat written for KDE running on Linux/BSD/Unix type operating system. In the spirit of open source, One characteristics of being open source is having others extend or provide their own version of the software. For example, altWinDirStat from from WinDirStat with some updates. Its a matter of seeing who can stand the test of time in the open source world.

Wouldn't you agree that it opens up more possibilities and increase access to better software?


In the diagram above, there are 3 distinct areas in the default layout after scanning of a directory. Which by the way can include a network share. 

In the area for Directory Summary, users can choose to access the sub-directories details and even delete directories. Click on a directory and its highlighted in the treemap. In the File extension summary, just a click and the disk view of that extension is shown. Click on the Coloured Treemap and the item is highlighted in directory and file extension summary areas, immediately.

Its a nifty and fast tool. 

Tuesday, September 29, 2015

Tutorial on Multiple Fragments in Activity

Here is an example to describe in codes how to create Fragment classes with Android Studio 1.4.

I wanted to be able to receive Button events and switch the Fragment depending on user selection. Need to be careful with rendering the layouts lower than API 23, as it did not generate the Design view properly.

Android Fragments in an Activity


Friday, September 25, 2015

Notes on the Sunshine app

Reviewed back lessons over last few months.

"Notes on Udacity Developing Android Apps"

Biggest problem was not passing the correct object to the ViewList. It kept giving a null error upon running the application.

The logging system was truly helpful for errors at runtime.


Upgrade to Android Studio 1.4 RC2

That was fast, RC1 was out in early September 2015 and shortly after that RC2 is released on 23 September. View the upgrade installation for Canary channel, RC1 at "Upgrade to Android Studio 1.4 RC1". Upgrade was smooth and without any problem recompiling target API 21 apk.

RC2 provide bug fixes and includes;

  • Update to the Theme Editor (using style.xml files)
  • In performance monitors it includes GPU and network profiler
  • The Vector Asset Wizard creates Android XML vector drawables, icons, from SVG files
  • Improved Android permission checks 
It is stable in terms of use and will surely provide a good experience for first time Android developers. With Android Studio 1.4, education institutions will surely be able to introduce Android Programming to a more advanced level, similar to how C++ was widely used.

Here are steps to upgrade RC2 from RC1;

Step 1: Check for updates

Start Android Studio and in the menu choose Help-> Check for Updates...
Click "Update and Restart". Ensure you have administrator rights to update the application or accept the request to update if such a request window appears.


Step 2: Restart Android Studio

This would be automatic if all went well. Verify RC2 is installed in the About.


Done.


Monday, September 21, 2015

Upgrade to Android Studio 1.4 RC1

Just saw there is an update to Android Studio to version 1.4RC1.

In existing Android Studio 1.1, update can be done easily with these steps;

(Tested on MS Windows 8.1)

Step 1: Update Android Studio

Open existing Android Studio (in this case its version 1.1) and click "Check", which is at the bottom of the Android Studio start page.


Step 2: Update configuration

After it searches for update on the Internet, click "Update and Restart"


After it has installed the update, choose to import my settings from a previous version (keep existing configuration).


Step 3: Update Plugin and other components

Platform and Plugin Updates, click "update". Click "Update now".


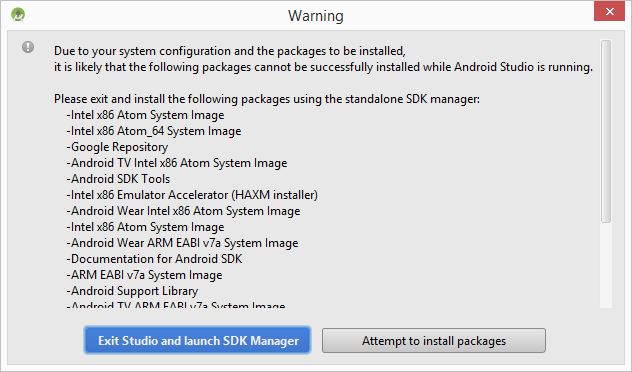
Click "Exit Studio and launch SDK Manager".
Choose "Install .. packages..." button. Choose ".


In Choose Packages to Install, choose "Accept License and click Install. My case above, it took 2.9GB of downloads.

Start Android Studio and complete rest of installation.

See an example of creating an Android Studio Project.

Troubleshooting:

Problem 1. After creating a new project, there is an Gradle sync error:

Warning:The project encoding (windows-1252) does not match the encoding specified in the Gradle build files (UTF-8). This can lead to serious bugs.

Solution: Upon new installation, the default IDE encoding uses Windows-1252 instead of UTF-8 as in project files. Change this from Android Studio menu File-> Settings-> Editor->File Encodings

Change the default encoding for project files to UTF-8. Click OK. Restart Android Studio and create a new project.


Problem 2: Rendering Problems.


Build the project.


Done.


Sunday, September 20, 2015

Samsung S5 Wifi not connecting automatically

Samsung S5 is a powerful Android mobile phone. In May 2015, the S5 received an update to Android 5.0 but has since had a problem with the wifi.


The smart network switch automatically switches from wifi when it gets weak, to mobile data. Usually, to save on mobile data its a good idea to turn it off. This way, even if wifi is weak it still stays on until signal is lost.

It can connect to wifi. However even after choosing smart wifi, it does not automatically reconnect when returning to the most wifi access point (AP) that it has saved the password. I say most because it can connect to open public wifi like Starbucks.

Previously, before the upgrade it was able to connect without problem.

Even resetting to factory did not help. Probably had something to do with me restoring my backup.

Here is how I got it working, clearing the S5 phone cache.
Step 1: Power off the S5

Step 2: At same time hold down following keys;
Volume up, power on/off, Home.

When it vibrates or see the galaxy start screen, release the power on/off.

Step 3: clear cache and restart
Use the volume key to select clear cache. Press the power button.

Once it says cache cleared, use volume button to select restart of phone and press power button.

Done.

Thursday, September 17, 2015

Howto Screenshot Desktop

The print screen key or "PrtSc" can be used to create a screenshot of the desktop and windows. This will activate gnome-screenshot from the gnome-utils package.

Gnome-utils contain;

  • dictionary
  • disk usage analyser
  • screenshot tool
  • search 


By default on a server setup of Centos Linux 6, the screenshot is not installed. This can be done easily.

Step 1: Install gnome-screenshot

As a admin role (root) at the terminal, type
# yum install gnome-utils

Step 2: Take screenshot of desktop or active windows

Screenshot of desktop
Press the print screen key or "PrtSc"


Screenshot of active window
Hold "Alt" key and press the print screen key or "PrtSc"

Edit the graphics name and press Save.

Delayed screenshot
This is useful if the screenshot can only be taken without user intervention.

  1. On desktop menu click Applications-> Accessories-> Take Screenshot
  2. Choose which area of desktop to take screenshot and enter the number of seconds for "Grab after a delay of ___ seconds.
  3. Click "Take Screenshot"


Done.


Paint program on Centos

Linux comes with open source software (OSS) for graphics editing, such as XPaint, GIMP and Tuxpaint. Vector editing can be done with Inkscape and xfig.

XPaint is a light weight program to do simple graphics editing and carries the GPL license.

Currently maintained by Jean-Pierre Demailly, but as stated in the "About" message, not to send bug reports.

Installation of XPaint (currently version 2.9.9.4) on Centos Linux 6.2 64 bits is quite straight forward.

Dependencies;

  • Xawd3d 1.5
  • gv 3.7.1
  • linXaw3dXft 1.6.2b
  • netpbm 10.47.05
  • psutils 1.17


Step 1: Install XPaint

Login with admin role (root) and type

# yum install xpaint
type y and press Enter

Step 2: Start XPaint

On the Centos Linux desktop, choose Applications-> Graphics ->XPaint


Click "Canvas" button and choose "New Canvas"


Tips on initial use of XPaint


Open an image to edit
File-> Open image...

Drawing lines, rectangle, circles, polygon
Click the Tool icon and choose the drawing tool.

Done.

Blog Archive